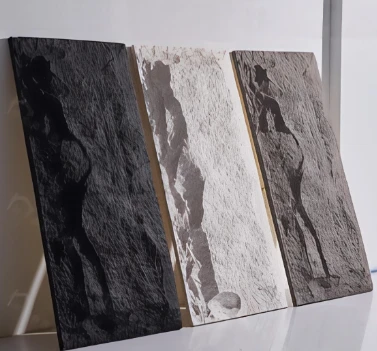
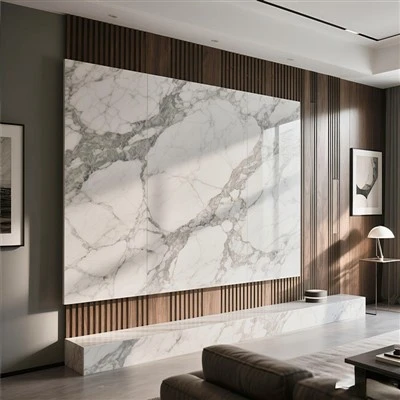
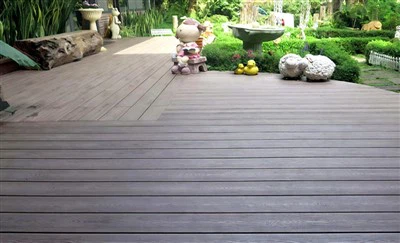
If you are reading this article, chances are you have already been drawn to the charm of PU stone panels – they offer the realistic texture of natural stone but are surprisingly lightweight. And your biggest question right now is: Can I install PU stone panels on a plaster wall?
The answer is a resounding yes. And as someone who has worked in this industry for many years, I can tell you: a plaster wall is actually one of the most ideal substrates for PU stone panels.
I'm Isabella Hernandez, Senior Sales Manager at Haining Longtime Industry Co., Ltd. Over the past decade, I have witnessed how PU stone wall panels have evolved from a niche product into an indispensable decorative material in residential and commercial projects around the world. Today, I would like to share with you, from the perspective of an industry expert, a complete guide to installing PU stone panels on a plaster wall – including some practical tips you won't find in the product manual.


Why Are PU Stone Panels the Best Match for Plaster Walls?
Before we dive into the installation steps, I want to take a minute to explain the core question: Why are PU stone panels particularly suitable for plaster walls?
Natural stone weighs 15–25 pounds per square foot, while PU stone panels weigh only 0.5–1 pound per square foot. This means that when you install PU stone panels on a plaster wall, the wall hardly requires any additional load-bearing reinforcement. Made from polyurethane foam, PU stone panels offer a 90% weight reduction while perfectly replicating the texture and feel of natural stone.
In addition, PU stone panels are waterproof, insect-proof, UV-resistant, and resistant to cracking. For interior plaster walls, these are all highly valuable properties.
My advice is: If your plaster wall is in good condition, with a flat and dry surface, then you can confidently install PU stone panels. No extra reinforcement, no complicated substrate treatment – this is one of the biggest advantages of PU stone panels.
Preparation Before Installation
Tools and Materials Checklist
Before you begin, make sure you have the following tools and materials ready:
|
Tool / Material |
Purpose |
|
PU stone panels |
Choose your preferred texture (slate, brick, pebble, etc.) |
|
Heavy-duty construction adhesive |
Polyurethane-based adhesive recommended |
|
Caulking gun |
For precise adhesive application |
|
Utility knife or fine-tooth circular saw |
For cutting PU stone panels |
|
Spirit level |
To ensure level installation |
|
Tape measure and pencil |
For measuring and marking |
|
Sandpaper (120-grit) |
For smoothing cut edges |
|
Caulk / silicone sealant |
For filling joints between panels |
|
Cloth |
For cleaning excess adhesive |
Preparing the Plaster Wall
This is the most easily overlooked yet most important step in the entire installation process.
- Clean the wall surface: Use soapy water to thoroughly remove dust, grease, or loose paint. Any contaminants will affect the adhesive's bonding strength.
- Check flatness: Use a spirit level to check for bumps or depressions. For small gaps, you can fill them with spackle and sand smooth. A special reminder here: If the wall has obvious unevenness (more than 3–5 mm of deviation), I recommend levelling it with plaster first. Although PU stone panels have some flexibility to accommodate minor irregularities, excessive unevenness will affect the final result.
- Ensure the wall is completely dry: This is a common mistake made by many DIY enthusiasts. If the plaster wall is damp, not only will the adhesive fail to bond properly, but prolonged exposure to moisture may also cause the panels to deform.
- Mark reference lines: Use a pencil and spirit level to draw vertical and horizontal reference lines on the wall. This will help you maintain alignment during installation.
Step-by-Step Installation Guide
Step 1: Dry-Fit (Layout Planning)
Before applying any adhesive, I strongly recommend that you do a dry-fit first.
Arrange the PU stone panels on the floor in the pattern you want. This allows you to preview the final look and confirm your cutting plan. Professional tip: Stagger the joints like brickwork (stagger joints) for a more natural and professional appearance.
Also, starting from the bottom is a very good habit – installing row by row from the bottom upwards helps prevent cumulative errors.
Step 2: Cutting the PU Stone Panels
Cutting PU stone panels is very simple, which is one of the reasons they are so popular with DIY enthusiasts.
- Measure the required size with a tape measure and mark it on the back of the panel with a pencil.
- Use a utility knife to score along the marked line several times (cutting through the surface layer), then bend the panel firmly – it will break cleanly along the scored line.
- Use sandpaper to smooth the cut edge and remove any burrs.
For curved cuts or openings (e.g., electrical outlets), a fine-tooth circular saw is recommended. Remember to wear safety goggles and gloves during operation.
Step 3: Applying the Adhesive
This is the critical step that determines the quality of the installation.
Using a caulking gun, apply adhesive to the back of the PU stone panels in a "snake" or "zig-zag" pattern. Pay special attention to the edges and corners of the panel to ensure sufficient bonding area.
Here is a tip I have learned from years of experience: Do not be stingy with adhesive. Many installation failures are caused by insufficient adhesive. Also, make sure to choose an adhesive that is compatible with the wall material – for plaster walls, a polyurethane-based construction adhesive is recommended.
Step 4: Mounting on the Wall
Align the adhesive-coated PU stone panels with your reference lines and press firmly against the wall. Gently wiggle the panel to help the adhesive spread evenly.
- Use a spirit level to check that it is level, and adjust it before the adhesive sets.
- Hold each panel in place for about 30 seconds after pressing to allow the adhesive to initially bond.
- Leave a gap of about 1/8 inch (approx. 3 mm) between panels for subsequent caulking.
For larger areas or for plaster walls installed outdoors, you may consider using a brad nailer or screws for additional fixation to increase stability.
Step 5: Caulking and Finishing
After all panels are installed, wait for the adhesive to fully cure (usually 24–48 hours).
Then, use a colour-matched silicone sealant or caulk to fill the joints between panels. Smooth the sealant with your finger or a spatula so that it is flush with the panel surface. Wipe away any excess sealant and adhesive with a damp cloth.
Final step: If the panel edges need trimming (e.g., around door or window openings), you can use PVC edge trims for a neat finish.
Frequently Asked Questions and Expert Answers
Q1: Does a plaster wall need waterproofing treatment?
A: For dry indoor environments, no. For wet areas such as kitchens or bathrooms, it is advisable to apply a waterproof primer first.
Q2: Can PU stone panels be used on exterior plaster walls?
A: Yes, but the plaster wall must be properly waterproofed and moisture-protected. For outdoor installation, additional mechanical fixing (screws or nails) is recommended.
Q3: How long after installation can the wall be used normally?
A: We recommend waiting 24–48 hours for the adhesive to fully cure before cleaning or placing furniture against the wall.
Q4: How do I clean the surface of PU stone panels?
A: For daily cleaning, use a soft brush or a slightly damp cloth to wipe gently. Avoid using strong acidic or alkaline cleaners.
Real-Life Case Study
Sydney, Australia – Modern Apartment Living Room Feature Wall
Last year, our Australian client James was renovating his apartment in central Sydney. The living room had a plasterboard partition wall that was 3.5 metres wide and 2.8 metres high. He had always wanted a stone feature wall, but he was worried that the weight of natural stone would exceed the wall's load-bearing capacity.
Our local distributor recommended the slate-textured PU stone panels series from Haining Longtime. James chose a dark grey slate finish, and the entire installation took less than 6 hours – completed easily by two people, without any heavy equipment.
"I simply couldn't believe this was PU material. Its texture and feel are exactly the same as natural slate I've seen, but it's amazingly light. My plaster wall has no burden at all." – James, Sydney
This case fully demonstrates that installing PU stone panels on a plaster wall is not only safe and reliable, but also highly efficient, with results that rival natural stone.
Conclusion
Installing PU stone panels on a plaster wall is not only feasible – it is very simple, economical, and efficient. As a member of Haining Longtime Industry Co., Ltd, I am proud to say that our PU stone panel products are widely used in residential, commercial, and outdoor projects around the globe, earning the trust of countless customers.
If you are considering adding a touch of stone texture to your plaster wall, give PU stone panels a try – light as a feather, beautiful as rock.
If you have any installation questions, feel free to contact the sales team at Haining Longtime Industry Co., Ltd. We offer not only high-quality products but also professional technical support
- Website: https://www.longyuanpanels.com/
- Email: ltfriend01@jxlongtime.com.cn
- Phone: 0086 173 7761 1682