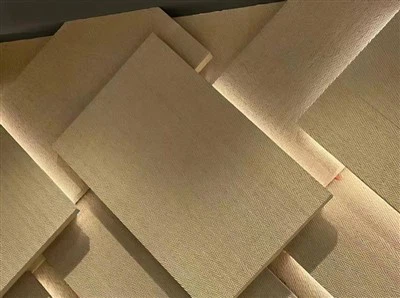
Installing WPC (Wood-Plastic Composite) wall panels is a great way to enhance the aesthetics and functionality of your space. As a WPC wall panel supplier, I'm here to guide you through the entire installation process, ensuring that you achieve a professional and long - lasting finish.
Pre - installation Preparation
Before you start installing WPC wall panels, proper preparation is essential. First, measure the area where you plan to install the panels accurately. This will help you determine the number of panels you need to purchase. Make sure to account for any windows, doors, or other openings in the wall.
Next, clean the wall surface thoroughly. Remove any dirt, dust, grease, or old paint. A clean surface will ensure better adhesion of the panels. If the wall is uneven, you may need to use a leveling compound to create a smooth base. This step is crucial as uneven walls can cause the panels to warp or not fit properly.


Gather all the necessary tools for the installation. You will need a measuring tape, a utility knife, a saw (either a hand saw or a power saw depending on your preference and the thickness of the panels), a drill, screws, a level, and a caulking gun. Having these tools ready before you start will save you time and frustration during the installation process.
Choosing the Right WPC Wall Panels
As a supplier, we offer a wide range of WPC wall panels to meet different needs. For example, if you are looking for panels that can reduce noise in a room, our Decorative Sound Absorbing Wall Panels are an excellent choice. These panels not only absorb sound but also add a decorative touch to your space.
If you are installing the panels in a damp area such as a bathroom or a kitchen, our Waterproof WPC Wall Panel is the way to go. These panels are resistant to water damage, ensuring that they will last for a long time in a high - moisture environment.
For high - traffic areas where the panels may be subject to wear and tear, our Wear - resistant WPC Wall Panels are designed to withstand daily use. They are made with durable materials that can resist scratches and abrasions.
Installation Process
Step 1: Mark the Wall
Use a measuring tape and a level to mark a horizontal line on the wall where the first panel will be installed. This line will serve as a guide to ensure that the panels are installed straight. You can use a chalk line or a pencil to make the mark.
Step 2: Cut the Panels
If the panels need to be cut to fit the space, use a saw to make the cuts. Make sure to measure twice and cut once to avoid making mistakes. When cutting the panels, wear safety goggles and a dust mask to protect yourself from flying debris.
Step 3: Install the First Panel
Start by attaching the first panel to the wall. You can use screws or an adhesive depending on the type of panel and the wall surface. If using screws, pre - drill holes in the panel to prevent it from splitting. Align the panel with the marked line on the wall and use a level to ensure it is straight. Then, secure the panel to the wall using screws or apply the adhesive according to the manufacturer's instructions.
Step 4: Join the Panels
Most WPC wall panels have a tongue - and - groove system that allows them to be easily joined together. Insert the tongue of one panel into the groove of the adjacent panel and press them firmly together. Make sure the joints are tight to create a seamless look. If there are any gaps between the panels, you can use a caulking gun to fill them with a suitable caulk.
Step 5: Continue Installing Panels
Repeat the process of cutting, installing, and joining the panels until the entire wall is covered. When you reach an opening such as a window or a door, measure and cut the panels to fit around the opening. You may need to use a coping saw to make more precise cuts for a clean finish.
Step 6: Trim the Edges
Once all the panels are installed, use a utility knife or a saw to trim any excess material from the edges of the panels. This will give the installation a neat and professional appearance.
Post - installation Care
After the installation is complete, clean the panels with a mild detergent and a soft cloth. Avoid using abrasive cleaners or tools that may scratch the surface of the panels. If there are any scuffs or marks on the panels, you can use a touch - up paint or a repair kit to fix them.
Regularly inspect the panels for any signs of damage or loose joints. If you notice any issues, address them promptly to prevent further damage.
Conclusion
Installing WPC wall panels is a relatively straightforward process that can transform the look of your space. By following the steps outlined above and choosing the right panels for your needs, you can achieve a beautiful and functional wall covering.
As a WPC wall panel supplier, we are committed to providing high - quality products and excellent customer service. If you are interested in purchasing our WPC wall panels or have any questions about the installation process, we encourage you to contact us for a purchase consultation. We look forward to helping you create the perfect space with our WPC wall panels.
References
- Manufacturer's installation guides for WPC wall panels
- DIY home improvement books and magazines on wall panel installation