Accurate measurement is the cornerstone of a successful PVC panel installation project. As a seasoned PVC panels supplier, I've witnessed firsthand how precise measurements can transform a space and ensure a seamless installation process. In this blog post, I'll share my insights and practical tips on how to measure for PVC panel installation, helping you achieve professional - grade results.
Understanding the Basics of PVC Panels
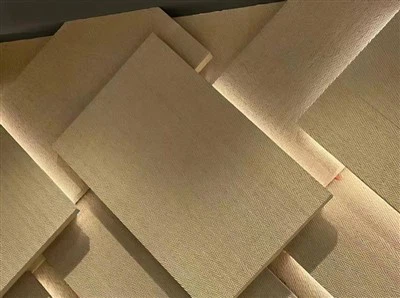
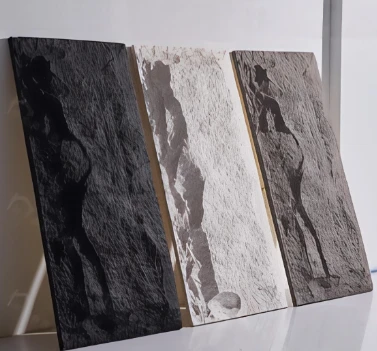
Before delving into the measurement process, it's essential to understand the characteristics of PVC panels. PVC, or polyvinyl chloride, is a versatile and durable material commonly used in interior and exterior applications. Our PVC panels come in various sizes, thicknesses, and designs, offering flexibility to meet different project requirements. Whether you're looking to renovate a bathroom, kitchen, or commercial space, PVC panels provide an attractive and cost - effective solution. For those interested in unique options, we also offer the Thin Flexible Stone Veneer Sheet, which combines the look of natural stone with the benefits of PVC.
Tools Required for Measurement
To measure accurately for PVC panel installation, you'll need a few essential tools:
- Tape Measure: A high - quality tape measure is a must - have. Look for one that is at least 25 feet long to handle larger spaces.
- Level: A spirit level helps ensure that your panels are installed straight and level. This is crucial for a professional finish.
- Pencil and Paper: You'll need to record your measurements, so keep a pencil and paper handy.
- Square: A framing square or combination square can be used to check for right angles and ensure precise cuts.
Measuring the Wall or Surface
The first step in measuring for PVC panel installation is to measure the wall or surface where the panels will be installed. Here's a step - by - step guide:
- Measure the Height: Start by measuring the height of the wall from the floor to the ceiling. Measure at several points along the wall, as walls may not be perfectly straight. Record the tallest measurement. This ensures that the panels will cover the entire height of the wall.
- Measure the Width: Next, measure the width of the wall at the base, middle, and top. Again, record the widest measurement. This accounts for any irregularities in the wall.
- Account for Obstacles: Identify any obstacles on the wall, such as windows, doors, electrical outlets, or light switches. Measure the height and width of each obstacle and note their positions on your paper. You'll need to cut the PVC panels to fit around these obstacles during installation.
Calculating the Number of Panels
Once you have the measurements of the wall and the dimensions of the PVC panels you've chosen, you can calculate the number of panels required. Here's how:
- Determine the Panel Size: Check the dimensions of the PVC panels you've selected. For example, if the panels are 8 feet long and 2 feet wide.
- Calculate the Wall Area: Multiply the height and width of the wall to get the total wall area in square feet. For example, if the wall is 8 feet high and 10 feet wide, the wall area is 80 square feet.
- Calculate the Panel Area: Multiply the length and width of a single panel to get its area. Using the example above, an 8 - foot by 2 - foot panel has an area of 16 square feet.
- Divide the Wall Area by the Panel Area: Divide the total wall area by the area of a single panel. In our example, 80 square feet divided by 16 square feet equals 5 panels. However, it's always a good idea to add an extra 10% to 15% of panels to account for cutting waste and any mistakes during installation. So, in this case, you might want to order 6 panels.
Measuring for Corners and Joints
Proper measurement of corners and joints is crucial for a seamless PVC panel installation. Here's what you need to do:
- Inside Corners: For inside corners, measure the angle of the corner using a protractor or a combination square. Most inside corners are 90 - degree angles, but it's important to double - check. You can then cut the PVC panels at a 45 - degree angle to create a miter joint. This gives a clean and professional look at the corner.
- Outside Corners: Outside corners can be more challenging. Measure the angle of the outside corner and cut the panels accordingly. You may need to use a corner trim or molding to cover the joint and give it a finished appearance.
- Joints between Panels: When installing multiple panels side by side, measure the gap between the panels carefully. A consistent gap of about 1/8 inch to 1/4 inch is recommended to allow for expansion and contraction of the PVC material.
Measuring for Ceiling Installation
If you're installing PVC panels on the ceiling, the measurement process is similar to wall installation, but there are a few additional considerations:
- Measure the Ceiling Height: Measure the height from the floor to the ceiling at several points to ensure accuracy. You may need to use a ladder or step - stool to reach the ceiling.
- Check for Level: Use a level to check if the ceiling is level. If the ceiling is not level, you may need to install furring strips to create a flat surface for the PVC panels.
- Measure the Ceiling Dimensions: Measure the length and width of the ceiling in the same way as you would for a wall. Account for any light fixtures, vents, or other ceiling features.
Measuring for Staircase Installation
Installing PVC panels on a staircase requires precise measurements to ensure a proper fit. Here's how to measure:
- Measure the Treads and Risers: Measure the length and width of each stair tread and riser. Record these measurements separately.
- Account for the Angle: Measure the angle of the staircase. This will help you cut the PVC panels at the correct angle for a seamless installation.
- Measure the Stringers: Measure the length and width of the staircase stringers. You may need to cut the panels to fit around the stringers.
Final Checks and Considerations
Before ordering the PVC panels, it's important to double - check your measurements and make any necessary adjustments. Here are some final checks:
- Review Your Measurements: Go over your measurements to ensure they are accurate and consistent. Check for any errors or omissions.
- Confirm Panel Sizes: Make sure the PVC panels you've chosen are the right size for your project. Check the manufacturer's specifications and compare them to your measurements.
- Consider the Installation Method: Different installation methods may require additional measurements or allowances. For example, if you're using a tongue - and - groove installation method, you'll need to account for the overlap between the panels.
Contact Us for Your PVC Panel Needs
Accurate measurement is the key to a successful PVC panel installation. By following these steps and using the right tools, you can ensure a professional - looking finish. As a leading PVC panels supplier, we're committed to providing high - quality products and excellent customer service. If you have any questions about measuring for PVC panel installation or need help choosing the right panels for your project, please don't hesitate to contact us. We're here to assist you every step of the way.

References
- "PVC Installation Guide" - Industry standard guide for PVC panel installation
- "Home Improvement Handbook" - General reference for home renovation and installation projects
- Manufacturer's product specifications for PVC panels