Over the past decade-plus of working with customers in North America, Southeast Asia, and Europe, "Can I install WPC flooring directly over an old wooden deck?" has been one of the questions I am asked most often. Frankly, the answer is not a simple "yes" or "no." It depends on what you mean by "wooden surface" - the old, weathered, cracked boards on top, or the wooden joist frame underneath that may still be sound. Choose the wrong one, and even the best WPC flooring will fail prematurely.
Below, I break down the installation logic from a practical project-judgment perspective and share two cases I personally handled.


1. First, Make the Call: The Old Wood Boards Usually Cannot Serve as the Substrate
Many property owners think they can simply cover the old wood boards with WPC boards and save the cost of removal. From a drainage and ventilation standpoint, however, this is a high-risk approach. WPC flooring needs continuous air circulation beneath the boards to carry away moisture and prevent condensation from accumulating. If it is installed directly over old wood boards, moisture becomes trapped between the two layers. The old boards deteriorate faster, and the underside of the WPC boards stays damp for long periods, leading to mold and dirt buildup. Once the old wood substrate continues to degrade beneath the covering, the fastening strength of the WPC flooring above will also gradually be lost.
Therefore, there are only two correct paths for dealing with a "wooden surface":
- Path A: The joist frame under the old boards has been inspected and confirmed to be structurally sound with compliant spacing → remove the old boards, retain or reinforce the joists, and install WPC flooring on top.
- Path B: The joists are decayed, loose, or spaced too far apart → completely remove the old boards and old joists, and rebuild the substrate.
The judgment criteria are straightforward: if the old boards feel noticeably springy or warped underfoot, or if the joist spacing exceeds 350 mm, Path B is the only responsible choice.
2. Installation When the Joists Are Retained (Path A)
If the joists pass inspection, installation can begin after the old boards are removed.
Step 1: Clean and inspect the joists. After removing the old boards, sweep debris and nails from the joists, and check each one for signs of decay or insect damage. Use a spirit level to spot-check whether the top surfaces of the joists are in the same plane; local height differences should be kept within an acceptable range. Joists that are clearly uneven need to be planed or corrected with shims.
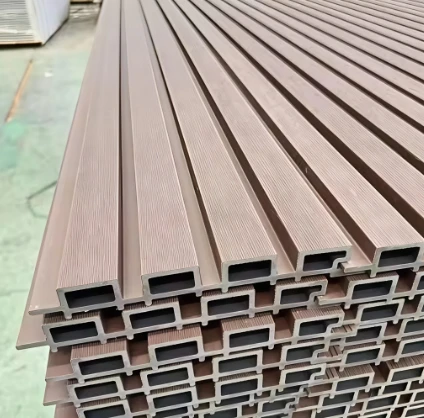
Step 2: Confirm joist spacing. WPC flooring has lower flexural stiffness than solid wood, so it is more sensitive to support spacing. For normal residential use, the center-to-center spacing of joists should be controlled at 250–350 mm. In high-traffic commercial areas or stair areas, the spacing should be tightened further. If the existing joists are spaced at 400–500 mm, auxiliary joists must be added between the original joists; the boards cannot simply be installed directly over them.
Step 3: Ensure ventilation and drainage below. The space beneath the joists should not be a completely enclosed, damp cavity. Ideally, there should be at least 35 mm of clear space between the underside of the WPC boards and the support surface for air circulation. If the original structure has poor ventilation, consider adding a drainage slope below the joist layer or raising the joists. This step is often overlooked, but it is key to whether the WPC flooring can reach its designed service life.
Step 4: Install the starter clips and lay the first board. Screw starter clips to each joist along the starting edge, and use a string line or laser level to ensure the clips are in a straight line. Fit the groove of the first WPC board into the starter clips, and check the perimeter gap between the board end and the wall.
Step 5: Lay the remaining boards with hidden clips. Insert intermediate clips into the groove of the installed board at each joist position, then push the next board into the clips and lock it in place. Every joist must receive a clip; do not skip any. The side gaps between boards are kept uniform by the built-in stops on the clips, typically 3–6 mm, to allow for drainage and thermal movement.
Step 6: Control end gaps and perimeter expansion gaps. When board ends meet, leave an end gap of 8–10 mm. Between board ends and walls, columns, or any fixed obstruction, leave at least 15 mm of expansion space. WPC has a higher coefficient of thermal expansion than wood, so use the lower end of the range for summer installations and the upper end for winter installations. No board end should be forced tight against a wall or trim.
3. Installation When the Substrate Must Be Rebuilt (Path B)
After removing the old boards and old joists, the substrate treatment depends on what lies beneath. If it is concrete or a hardened surface, aluminum joists or WPC-specific joists can be used, leveled with adjustable pedestals or shims, with joist spacing following the 250–350 mm range above. The key is that an air cavity must be maintained between the joist system and the ground; the joists must not be laid flat directly against a sealed concrete surface. If the surface below is soil or gravel, it must first be compacted and drainage addressed before the joists are installed.
The initial cost of rebuilding the substrate is higher than "direct covering," but WPC flooring itself typically has a service life of 15–20 years or more. Fixing new flooring to an old wood structure that is about to fail means trading short-term savings for premature renovation.
4. Two Real Project Cases
Case 1: Full Replacement of a Wooden Deck at a Coastal Resort in Southeast Asia
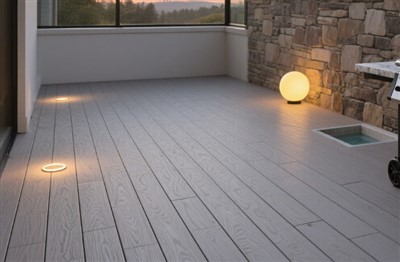
The resort is located in a high-humidity coastal area. Its original outdoor wooden deck had developed extensive decay and warping in less than six years, and some areas felt noticeably soft underfoot. The owner initially wanted to keep some of the boards that "looked fine" and cover them with WPC to control the budget. After a site inspection, we found that beneath the boards that still looked acceptable, the joists had softened due to long-term moisture penetration, and the joist spacing was mostly 450–500 mm, far beyond the safe support range for WPC flooring. We recommended that the owner abandon the covering plan and remove all old wooden deck boards and old joists, then rebuild the frame system with WPC-specific joists at 300 mm spacing, using adjustable pedestals to create a continuous ventilation cavity beneath the boards. The project replaced more than 600 square meters of outdoor decking and used dark wood-grain co-extruded WPC boards. Follow-up visits after two rainy seasons showed no standing water on the board surface, uniform end gaps and perimeter gaps, and no warping or mold spots.
Case 2: Wooden Substrate Renovation for Balconies at a High-End Hotel
A hotel balcony renovation project had to be carried out room by room without taking the hotel out of service, and the schedule was extremely tight. The original substrate consisted of preservative-treated solid wood boards on wooden joists. After inspecting each room, we found that the joist structure in most rooms was still stable, but the joist spacing was 400 mm, and after removing the old boards, there were local uneven areas on the top surfaces of the joists. Our approach was to retain the qualified joists, add auxiliary wooden joists between the original joists to reduce the effective support spacing to 300 mm, correct local height differences by sanding and shimming, fasten every joist and every clip position one by one, and leave a uniform 15 mm expansion gap where board ends meet the wall. The balconies face the pool area, where humidity fluctuations are significant, so in corners with limited ventilation beneath the boards, we added ventilation spacers to improve airflow. The project was completed through room-by-room rotation, with no rework caused by substrate issues. The product used was Haining Longtime Industry's co-extruded outdoor WPC flooring, certified to ISO 9001, CE, and ASTM, with a core formulation of 60% wood fiber and 30% HDPE, which demonstrated stable dimensional performance in the coastal high-humidity environment.
Final Thoughts
When installing WPC flooring on a wooden surface, the core decision is not in the "laying" stage, but in the assessment of the old wood structure before installation. The joists are the true load-bearing and ventilation platform for WPC flooring; if the joists are not qualified, no surface-covering solution will work. If you are evaluating an old wooden deck renovation project, you can send us site photos, joist spacing, and the condition of the old boards. The Haining Longtime Industry team can help with substrate feasibility assessment and installation solution matching.
- Website: https://www.longyuanpanels.com/
- Email: ltfriend01@jxlongtime.com.cn
- Phone: 0086 173 77761 1682
- WhatsApp: +86 173 7761 1682